A burgundy crochet cover, an ivory bow and two long ribbon tails make a striking iPhone 18 crochet bow case. The detail that needs the most planning is the camera opening: the decoration must work around the actual phone and fitted case, with space left for every camera, flash and control.
This article is a design and fitting guide for a close-fitting crochet cover worn over a model-specific case. It does not provide a tested, stitch-by-stitch shell pattern. For the decorative pieces, use our complete crochet bow and long-tail pattern. The project illustrations are AI-generated design concepts, not photographs of a physically tested product.
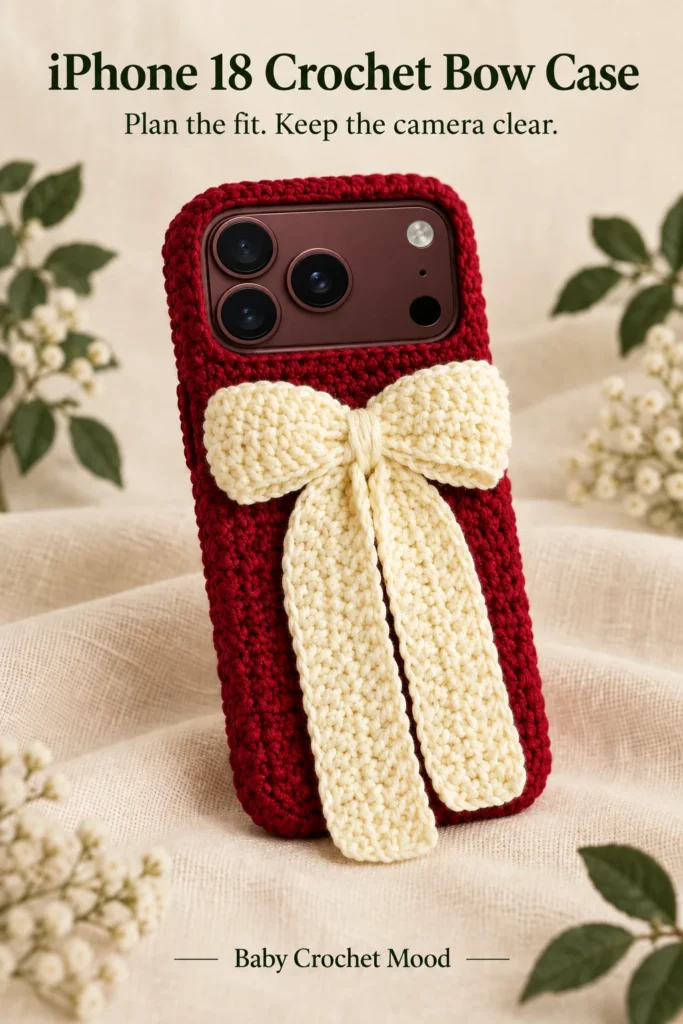
Plan an iPhone 18 Pro crochet case around the camera
Apple’s iPhone 18 Pro imagery shows a wide camera area across the upper back, with three main lenses toward the left and additional components toward the right. A small square opening copied from an older phone cover is not a reliable template. Compare the design with Apple’s official iPhone 18 Pro and Pro Max images, then use the actual compatible case for the working outline.
Keep the whole camera area free, including the flash and smaller openings. Allow for the thickness and movement of the crochet edge, not just the diameter of the visible lenses. The bow should sit below that area with enough separation that its upper corners cannot fold into it during handling.
The images on this page illustrate that wider layout, but they are not dimensioned cutting templates. Do not count stitches from the illustration or assume a case photographed at an angle shows its true proportions.
Choose the correct base for Pro or Pro Max
Begin with a plain fitted case made for your exact handset. An iPhone 18 Pro Max crochet case needs its own outline; enlarging every part of a Pro design by the same percentage can move camera and button openings to the wrong places. Record the model and the particular base case, since raised rims and side shapes differ between cases.
The crochet belongs outside the rigid case. Putting a layer of yarn between the phone and an already snug shell can prevent that shell from seating properly. During the craft work, remove the phone and fit the crochet against the empty case. Make the bow first if the correct phone or case has not arrived yet; settle the fitted cover dimensions when you can check them.
Make a paper layout before crocheting the cover
- Trace the back outline of the empty case onto paper. Mark the camera opening, the outer edge and the area where the case curves toward the sides.
- Make separate notes for buttons, side controls, charging port, speakers and microphone openings. A back view alone cannot show all of them.
- Cut a paper bow shape and two tail shapes. Arrange them below the camera area, staying inside the back outline.
- Try holding the empty case with the paper pieces in place. Move the bow if its centre sits where your fingers normally grip or if the tails would fold around the bottom.
- Record the usable bow width, bow height and maximum tail length. Keep the camera boundary visibly marked throughout the project.
Use our iPhone 18 measurement guide for the difference between handset dimensions and case dimensions. Its pouch circumference formulas are for enclosed sleeves; a fitted cover additionally needs the camera opening and each control position mapped on the template.
Choose a fabric that keeps the outline readable
A smooth yarn and a simple stitch make it easier to see whether the cover follows the case. Single crochet is a useful fabric to sample because the stitches and edges are straightforward to count. Avoid treating a yarn label’s suggested hook as a promise of finished size. Make, wash and dry a swatch using the care method you intend for the cover.
For a measured straight section, multiply its width by stitches per centimetre and its height by rows per centimetre. As an arithmetic example, a 7 cm section at 2.5 stitches per centimetre needs 17.5 stitches, so 18 stitches would predict 7.2 cm. That rounding matters on a fitted item. Compare the resulting fabric with the template instead of stretching it until it looks close.
Our gauge swatch lesson explains how to measure the middle of the fabric, and the yarn and stitch comparison helps you evaluate density and seam bulk.
Separate the lower back, camera frame and side shaping
A fitted cover has several different jobs. The lower back provides a flat area for the bow. The camera frame follows the opening. The sides hold the cover in position while leaving controls usable. Plan these regions separately before choosing a full cover pattern or adapting one.
If adapting a measured single-crochet panel, leave the camera region out as you work: stop rows at its boundary and work the remaining sections separately. Join a bridge only where the actual template has room for one. Do not crochet a solid back and cut a camera hole through the finished stitches; that can release the fabric and leave unsecured ends.
The side shaping needs its own trial fitting. A decorative frame that presses a button, folds over the display edge or prevents the base case from seating needs to be remade. This guide intentionally leaves those counts to a pattern fitted to the exact case. A universal “chain this many” instruction would hide the most important part of the project.
Use the bow to set the colour balance
| Crochet cover | Bow and tails | Effect |
|---|---|---|
| Deep burgundy | Warm ivory | A strong contrast like the reference style |
| Dusty rose | Cream | A softer, closely related palette |
| Forest green | Oatmeal | An earthy combination with a clearly visible bow |
Sample the two yarns together after washing, particularly when a dark colour sits against a pale one. Check the yarn labels for compatible care. Keep the centre band narrow enough that the two bow loops remain visible, and let the tails end above the bottom edge of the case.
Attach the bow to the crochet, then check the fit
Once the fitted crochet base is stable, remove it from the phone and tack the bow to the crochet back with matching yarn. Catch the centre and the backs of both loops at several points so the decoration cannot rotate into the camera area. Secure the upper tails, keeping all stitches and knots within the textile assembly. Do not sew through the phone or glue decoration directly onto it.
Refit the finished cover and check the entire camera area, flash, controls, speakers and charging port. Check camera views after fitting, including the wider view, and remove the cover if yarn enters the image or flash reflections appear. Do not assume wireless charging or magnetic accessories will work through the added yarn and bow; remove the decorative layer for charging if it interferes.
This design is decoration, with no tested drop protection or holding strength. Keep carrying the phone by the fitted case itself, not by the bow or tails. When you are ready to make the decorative pieces, follow the iPhone 18 case bow pattern. If you want a simpler first project while planning the fitted cover, the plain sleeve guide includes a free printable worksheet.