A lining can give a crochet phone pouch a smoother interior and cover the open spaces of a granny-square design. It also takes up room. The most useful order is to fit the fabric lining around your phone first, then make sure the crochet shell fits around the lining.
This finishing guide works with a measured iPhone 18 Pro or Pro Max pouch and other similarly constructed sleeves. It assumes you already have a crochet shell or a basted outer sample. Start with the beginner sleeve recipe for plain fabric, or the granny-square construction guide for motifs. The measurements below are examples to test, not a guaranteed model-specific fit.
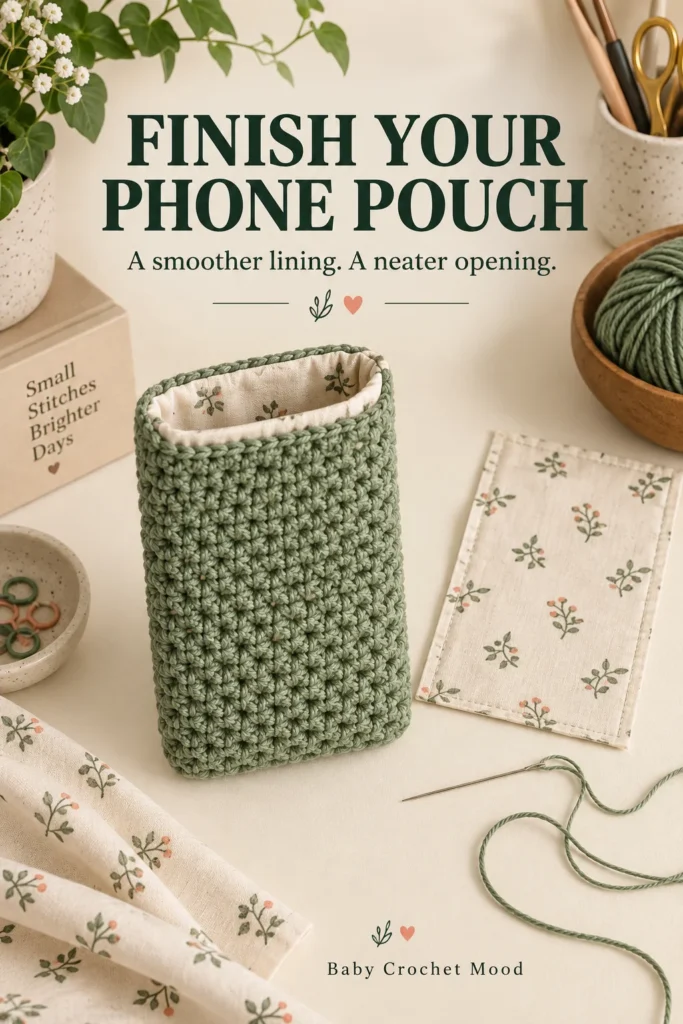
Decide whether a lining helps your fabric
Look inside the empty crochet shell. Can loose yarn ends catch on the case? Are the motif openings larger than you want? Does the phone slide comfortably past the seams? A smooth woven lining may help with those particular problems. It will not turn crochet into a tested drop-proof or waterproof case.
If your dense single-crochet sleeve already has a neat interior, you may prefer to leave it unlined. Either choice still needs a fit check. Keep a separate protective phone case if you normally use one, and include that case when measuring. Avoid adding bulky padding without recalculating the available room.
Prepare fabric before cutting
Choose a lightweight, smooth woven fabric and matching sewing thread. You will also need fabric scissors, a ruler, a fabric marker, clips or pins and a hand-sewing needle. Wash and dry the lining fabric according to its care instructions before measuring. Prepare the crochet shell using the yarn label’s instructions too.
Check that the two care methods are compatible before attaching the layers permanently. Press the woven fabric only as its label allows; do not assume the crochet yarn can take the same heat. Lay everything flat on a clear surface and keep the phone away from pins and needles.
Plan a separate, folded lining pouch
The simplest inner pouch is one rectangle folded at the bottom, with two side seams and turned top hems. First choose a trial finished flat width F and finished side height H that fit the phone comfortably. Use the short and long wrap method in the sizing guide as a starting point, then test a paper or scrap-fabric mock-up.
Let a be the sewing allowance on each side. Let h be the total fabric consumed by each top hem. Cut one rectangle with:
- Cut width = F + 2a.
- Cut length = 2H + 2h.
For a trial F = 9.5 cm, H = 17.5 cm, a = 1 cm and h = 1 cm, the cut rectangle is 11.5 × 37 cm. Each top hem uses two 0.5 cm folds, consuming 1 cm in total. The example is a sewing calculation, not a claim that those dimensions fit every iPhone 18 case.
Sew and test the inner pouch
- At both short ends, turn 0.5 cm toward the wrong side, then another 0.5 cm. Secure each hem with small, even stitches. Use your chosen folds if h differs from the example.
- Fold across the rectangle halfway along its length so the two hemmed short ends meet. Place the right sides of the fabric together.
- Baste the two long side seams at allowance a. Keep the top open and the bottom folded.
- With the lining still wrong-side out, place the phone inside gently over a table. The clean right side should face the phone, while the seam allowances stay outside the lining.
- Adjust the basted seams if needed. Remove the phone, then sew the side seams securely with small backstitches. Secure thread ends and finish any fraying raw edges.
Do not trim allowances close to the seam until the fit is settled. If the opening is too small, loosening only the top stitches will not correct an undersized lining all the way down. Recut a wider rectangle when the allowances cannot safely provide the missing width.
Fit the crochet shell around the lining
Place the lining inside the crochet shell with the lining’s seam allowances facing the crochet. The smooth lining surface faces inward toward the phone. Align the bottom folds and the two side seams without twisting either layer. The lining top should sit slightly below the crochet opening so it does not roll outward.
Clip the top edges at the seams and midway between them. Insert the phone for one final fit check, then remove it before sewing. Both layers should lie without the lining pulling the crochet inward or the crochet forcing the lining into large folds. If one layer is substantially larger, change that layer rather than hiding the difference in a gathered top seam.
Attach the opening with small stitches
Work around the opening with small hand stitches, catching the folded lining hem and a small section of the inner crochet fabric. Try to avoid carrying the thread visibly across the outside of the pouch. Keep the thread relaxed enough for the edge to lie flat, but not so loose that it forms snagging loops.
Secure the thread and remove every pin, clip and temporary stitch. Check the opening again. If you want a crochet edging, add a short trial section first: a firm slip-stitch border can narrow the mouth. Use the simplest edge that keeps the phone easy to insert and remove.
Decide on a closure after the fit is finished
An open top is easiest for a sleeve that stays upright inside another bag. If you need a closure, test its placement with the phone inside, remove the phone, then attach it. A fabric tab with a sew-on closure can keep hard hardware away from the screen when properly covered. Avoid loose decorative pieces inside the lining.
This guide does not specify a load-bearing strap or test a closure’s holding strength. Keep the pouch over a soft surface when checking it, remove it for charging, and record the final lining dimensions beside your crochet measurements. That small record makes the next sleeve much easier to finish neatly.