A crochet cape with a shawl collar gets much of its character from three choices: a generous shoulder drape, a contrasting front band and a soft fold around the neck. A simple closure draws the fronts together and lets the collar frame whatever you wear underneath.
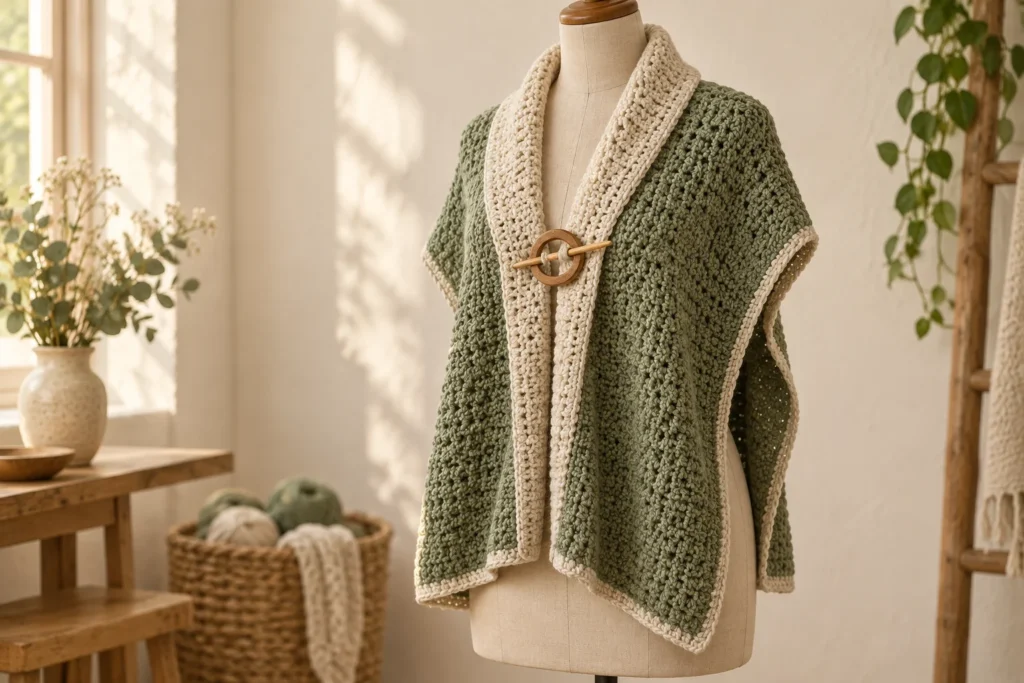
The visual starting point for this guide is a two-tone cape shared on Pinterest, with a broad collar, dark edging and a decorative fastening. Its original written pattern could not be verified from the Pin. The article below develops the idea into an original planning guide with new illustrations, a construction sketch and worked sizing examples. It is not a tested, row-by-row pattern for the pictured garment.
Decide which part of the look you want to keep
Start with the silhouette. An open-front cape covers the shoulders and upper arms while allowing the sides to hang freely. A ruana-style wrap can create a similar effect with a back section and two separate fronts. A cardigan adds defined arm openings or sleeves and needs a different fit plan.
Choose one main feature to emphasise. A wide contrasting collar can carry the design on its own. If you also want a cable panel, shaped shoulders or a rounded hem, look for instructions that explicitly include those features. A photograph can suggest the result, but cannot show the increases, short rows or seam placement needed to produce it.
Our new colour concept uses sage for the body and oatmeal for the collar and edging. You could also try navy with camel or charcoal with soft grey. Lay actual yarn samples beside a shirt or coat you already wear; a pleasing pair of colours on a screen can look different in daylight.
Choose a construction you can explain on paper
A useful starting exercise is to sketch a two-panel ruana. Each long rectangle travels from the back hem, over one shoulder and down the front. Joining the panels along part of their inner long edges creates the back; the remaining inner edges form the front opening.
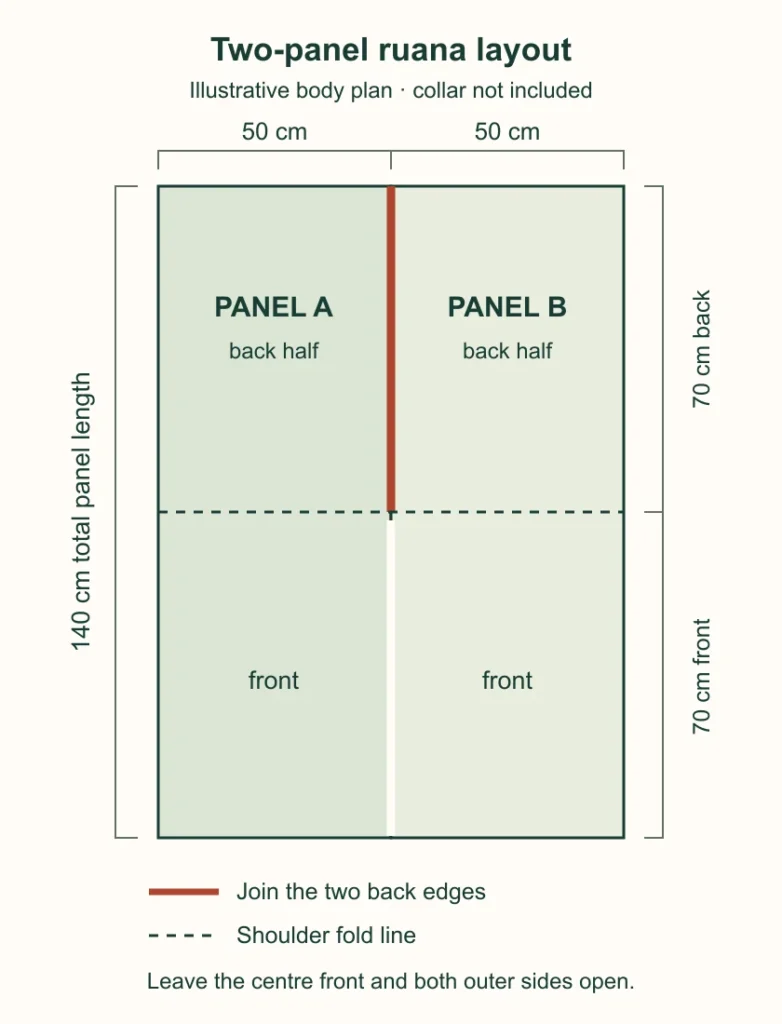
In the diagram, two panels measure 50 cm wide by 140 cm long. Joining 70 cm along the centre back leaves the other 70 cm open at the front. Before borders, that gives a flat body 100 cm across and approximately 70 cm from the shoulder fold to each hem. These figures describe a geometry example, not a size recommendation.
This simple layout produces straight panel edges. A rounded cape hem, the cable shown on the back of the inspiration image, or a shaped neckline requires a pattern designed for that detail. Keep the sketch simple until you have checked how the basic wrap hangs on the intended wearer.
For a published example of an open-front construction, Tamara Kelly’s Seaside Ruana builds a rectangle that divides into two fronts. Its stitch pattern and measurements belong to that separate design; follow the original instructions if you choose to make it.
Measure coverage and length before selecting a size
Measure from the base of the neck down to the preferred back hem, and check where the front hems should fall. Then drape a lightweight cloth over the shoulders to decide how far the sides should extend along the arms. Move, sit and reach forward while holding the intended front overlap.
The Craft Yarn Council’s sizing guide explains body measurements such as cross-back and back-waist length. Use those measurements as a reference, then add the coverage and ease your wrap needs. A body measurement is not automatically the finished garment dimension.
- Shoulder-to-hem length: check both front and back on the wearer; the same flat length can hang differently over the body.
- Side coverage: choose where the fabric should end along the upper arm or forearm.
- Front opening: reserve room for the collar and the intended overlap without pulling the back tight.
- Collar width: decide how much band should show after it folds back.
Keep the borders separate in your notes. Adding several centimetres around an edge changes the finished outline, so do not calculate the body to the full desired size and then forget the extra fabric.
Choose the yarn by the fabric it makes
For an indoor layer, look for a fabric that hangs comfortably over a shirt. For outdoor warmth, assess whether the chosen stitch and yarn give enough coverage without making the whole cape cumbersome. Yarn weight categories narrow the options, but the sample tells you how the fabric behaves.
Make a generous gauge swatch in the stitch you intend to use. Hold it vertically, fold one edge back and let it rest over a shoulder. Wash and dry it according to its care instructions before taking final measurements. A neat square on the table can feel surprisingly stiff when folded into a collar.
For a first construction exercise, half double crochet gives you a straightforward fabric to measure. More prominent texture, such as post stitches, changes thickness and may change gauge. Use the actual stitch pattern for every calculation.
Choose body and collar yarns with compatible care requirements, and test them together. If one grows more than the other after washing, the attached band may pull or ripple. Our yarn-substitution guide explains what to compare beyond a matching weight label.
Turn the panel sketch into a stitch-count example
Suppose your finished half double crochet swatch measures 16 stitches and 12 rows per 10 cm. For one of the illustrative 50 by 140 cm panels:
| Measurement | Calculation | Result |
|---|---|---|
| 50 cm panel width | 50 × 16 ÷ 10 | 80 stitches |
| 140 cm panel length | 140 × 12 ÷ 10 | 168 rows |
| 70 cm back join | 70 × 12 ÷ 10 | 84 row lengths |
For plain half double crochet with an uncounted chain-two start, 82 starting chains give 80 stitches when the first stitch is worked in the third chain from the hook. This explains the arithmetic; your selected pattern may use a different foundation, edge treatment or stitch multiple.
The example uses US terminology: half double crochet is UK half treble. Keep the same terminology throughout your notes. Use the stitch and row calculator with your own swatch numbers, then adjust to the pattern’s required repeat. Check the actual panel dimensions as you work.
Plan the collar as a separate piece of fabric
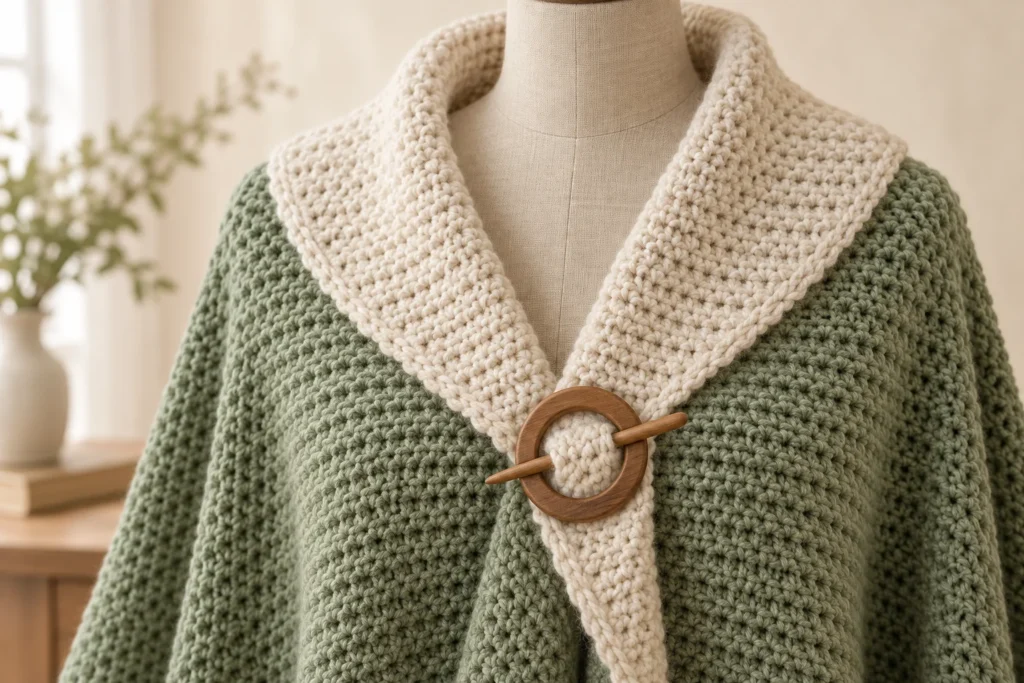
A narrow edging and a wide fold-back collar do different jobs. The edging tidies the outline; the collar needs enough width and flexibility to turn smoothly around the neck. Adding the same number of rows everywhere does not guarantee a shaped shawl collar.
If a full shawl collar is your priority, choose a pattern with explicit collar shaping and pickup instructions. Depending on the construction, it may use additional shaping near the neck. Read that section before beginning the body so you know what edges it needs.
For a design experiment, attach a short collar sample to an edge sample and examine it both flat and folded. Mark evenly spaced sections of the edge and compare the number of pickup stitches in each. Crowding too many stitches into a short distance can create ripples; too few can draw the edge inward. A small sample gives you a place to correct that balance.
Keep the front band wide enough for your chosen closure without making it so heavy that it drags the neckline forward. Do a temporary fitting before completing all the finishing rows.
Estimate body yarn and collar yarn separately
A swatch can provide a rough shopping estimate when it uses the same yarn, stitch and finishing method as the intended fabric. Suppose a measured 20 by 20 cm body swatch uses 10 g of yarn. Its area is 400 cm². The two example panels total 2 × 50 × 140 = 14,000 cm², so their estimated body weight is 14,000 ÷ 400 × 10 = 350 g.
If that yarn contains 200 m per 100 g, 350 g represents about 700 m. An illustrative 15% allowance gives 805 m; at 200 m per ball you would round up to five balls. This is a worked estimate for the body only, not a verified quantity for the pictured cape. Different texture, resizing and finishing can change the amount substantially.
Estimate the contrasting band from its own sample and planned area, then include the outer edging and finishing tails. Use the yarn cost calculator to compare the complete basket in your currency. Save each colour’s label and dye lot with the project.
Choose the closure after checking the drape
A smooth shawl ring or suitable shawl pin can hold the fronts while allowing some adjustment. Test its weight on the real fabric and check for snagging or stretched holes. The new illustrations use a simple wooden closure as a design idea.
If you prefer a button, make a sample buttonhole with the actual button, and check the overlap while the garment is being worn. Avoid placing the fastening where it has to pull two distant front edges together. If the closure creates diagonal strain lines, reconsider the fit or position before tightening anything.
Finish by checking the centre-back seam, matching hem lengths, comfortable neck fold and secure ends. Keep your swatch, dimensions and yarn notes together. They turn a saved inspiration image into a project plan you can evaluate before spending time on a full garment.