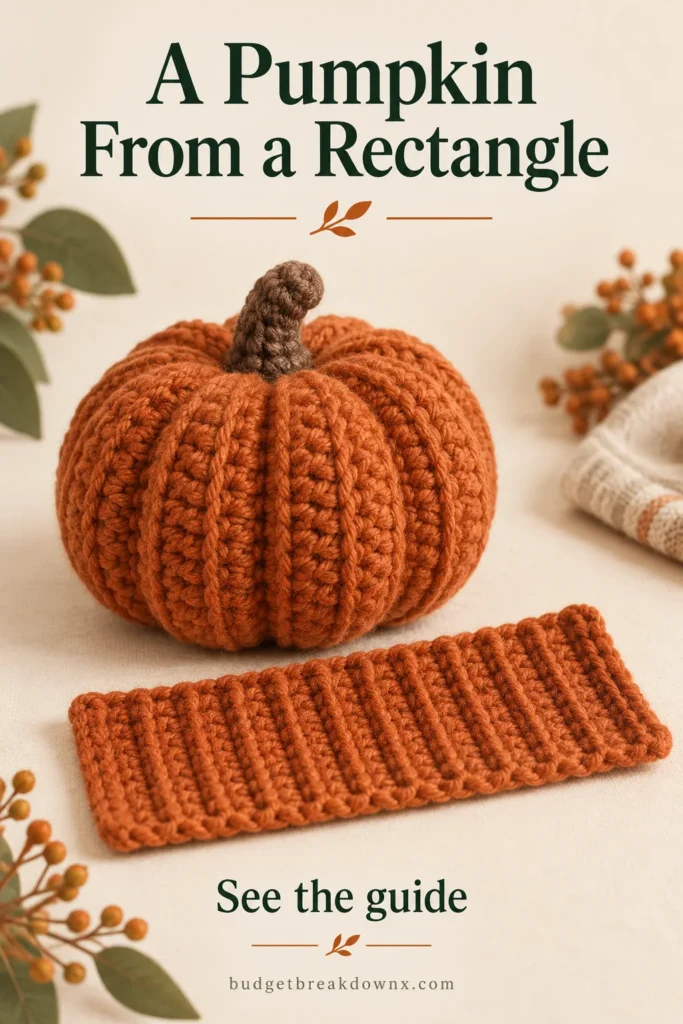
A crochet pumpkin made from a rectangle is a useful way to practise shaping without increasing in the round. The fabric starts flat. Joining two edges makes a tube, gathering the open ends makes a rounded form, and a few long shaping strands suggest the pumpkin’s grooves.
The important detail is the direction of the fabric: the stitches across each row run from the pumpkin’s bottom toward its top. The repeated rows travel around its body. Changing these two measurements has different effects.
Materials and terms
Use smooth orange yarn, a compatible hook, a little brown yarn, suitable craft stuffing, a blunt yarn needle, scissors and two stitch markers. A medium-weight yarn is easier to inspect than a very fluffy one. Start with the hook suggested on the label, then check that stuffing will not show through the fabric.
Terms: ch = chain; sc = single crochet; BLO = back loop only. The turning chain does not count as a stitch. See our US/UK terms guide if needed.
Pattern note: The stitch arithmetic in this original practice recipe has been checked, but the project has not been physically sample-tested. Make a small trial before using special yarn or producing a matching set. US crochet terms are used.
Make the ribbed rectangle
- Chain 17, leaving a long tail for joining.
- Row 1: sc in the second chain from the hook and in each remaining chain. You have 16 sc.
- Rows 2–30: ch 1 and turn. Work 1 sc in the BLO of each of the 16 stitches. Mark the first and last stitch if they are hard to see.
- After row 30, leave a generous tail. Do not gather anything yet.
The rectangle should still have 16 stitches across every row. Stretch it gently in both directions and notice which measurement changes most. Ribbing that is pulled tight during assembly will behave differently from a relaxed swatch.
Join the correct edges
Bring the foundation-chain edge and the final row together, matching their 16 stitch positions. Sew them together with small, evenly spaced stitches to make a tube. The row ends now form the two open rims. Turn the seam inside if you prefer a neater outside.
Weave a strong yarn tail through the row ends of one open rim, taking a similar-sized bite at each row. Draw the opening closed gradually, secure it, and pass the tail through nearby fabric before trimming. Add small amounts of stuffing through the other end. Aim for an evenly filled shape rather than a hard ball.
Gather the second rim in the same way. If the hole will not close, check for excessive stuffing or very loose gathering stitches before pulling harder. Forcing a thin strand can break it.
Add grooves and a simple stem
Use a long strand of orange yarn to travel from the bottom centre through the pumpkin to the top centre, then down around the outside and back through the centre. Repeat at evenly spaced positions, drawing each outside strand just snug enough to make a groove. Four to six divisions are a visual starting point; adjust them while the strands are still movable. Secure the ends inside the fabric.
For a small brown stem, chain 5 and work 4 sc back along the chain, starting in the second chain from the hook. Fasten off, fold or roll the strip into a short stalk, and sew its base securely over the top gathering point. This is a decoration, not a handle for lifting the pumpkin.
Change the proportions deliberately
| Change | Likely effect |
|---|---|
| More stitches in each row | More fabric between the top and bottom gathering points |
| More repeated rows | A wider tube before gathering |
| Less stuffing | A softer, more compressible pumpkin |
| Tighter shaping strands | Deeper grooves and a more compressed centre |
These are construction relationships, not guaranteed finished dimensions. Make and measure one pumpkin before scaling a group. If it looks tall and narrow, add rows to the next rectangle; if it looks very broad, reduce the row count or increase the stitches across the row. Keep the successful counts with your yarn and hook notes.
Keep making
- Halloween Crochet: 20 Projects and Guides to Plan Your Makes
- Crochet Halloween Garland: Motif Spacing and Assembly
- Halloween Crochet Yarn: Colour Palettes and Scrap Planning
Explore the Halloween crochet collection · Visit the crochet learning library